Would you like some cake darling?

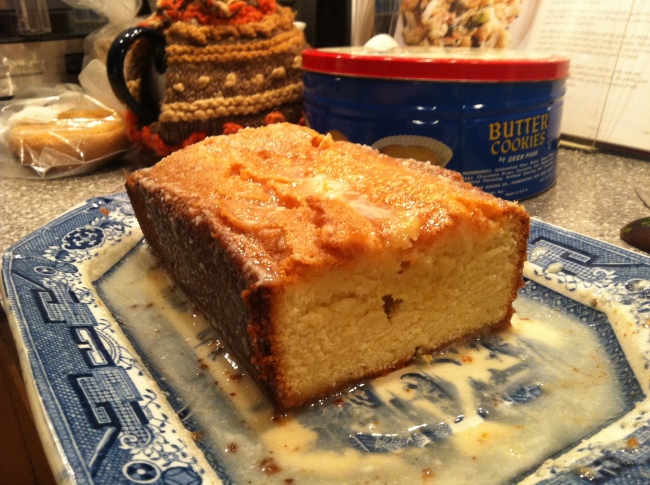
Here’s a cake that I made for my stepmom’s birthday. After we serenaded her with our very rough-at-best version of “Happy Birthday” we asked her if she would like some cake for dessert. Okay, that’s not the way the question was posed originally, but I think it works better for a recipe adapted from the BBC, don’t you? This was a challenging recipe to make and without the help of Google’s quick conversions I’m not sure the cake would have turned out well. Math wasn’t the only issue though, this cake is really dense and it takes forever in the oven. All in all it turned out well, and Helen was quite happy to have a delicious dessert with which to celebrate her birthday. For reference, here is the original recipe.

Some words of advice if you were to attempt to replicate this recipe: be decisive with your decisions. If it needs 10 more minutes in the oven, go for it. It’s better to be more like Winston Churchill than Neville Chamberlain here because you wouldn’t want to ruin the cake. Am I right? I needed to add about 15 to 20 minutes to the originally suggested bake time, so beware.

The recipe:

The cake:

Preheat oven to 375ºF 

½ cup of softened butter (plus more for the pan), I prefer salted always but unsalted is fine too

½ cup of white sugar

½ cup of flour

1 Tbs. baking powder

4 large eggs

2 lemons, you’ll need the zest of both but the juice of one


The drizzle/icing:

¼ cup of white sugar

1 lemon, juiced

OR

½ cup powdered sugar

4 oz. cream cheese, or about a half a stick at room temperature

1 lemon, juiced

Aren’t you glad that I did all of those pesky conversions from grams to cups? Yeah, it turns out that it’s a half-pound cake, British style. Who knew?

First, take your softened butter and sugar and begin to cream the sugar as if you were making cookies. Once the sugar is fully incorporated into the butter, go ahead and add your lemon zest and mix. Then add your four eggs to the mixture and work those in. On the side, take mix together the baking powder and the flour. Note: I encourage you to always sift your flour before baking in order to prevent lumps. Then, slowly fold your flour into the egg/butter/sugar mixture, making sure to work from the side of the bowl inwards in order to not to miss any flour on the sides. 

After having mixed the batter, take a stick of butter and grease a bread tin so that it’s entirely covered. Then pour your batter into the pan and place in the oven, which should be preheated to 375ºF. Bake for about 45 minutes to an hour.

Now for the drizzle or frosting. I gave the choice of either the drizzle or the frosting because I think both could work. The drizzle seeps into the cake and gives it a great texture, making it softer. But at the same time, I think a cream cheese frosting works just as well and it is a little more aesthetic for those crowd pleasers out there. I used the drizzle, so that’s where I’ll start.

The drizzle is really simple. Just juice your lemon (you’ll need about ½ cup of juice) and add the ¼ cup of sugar to the liquid. For the cream cheese frosting, you’ll need to sift ½ cup of powdered sugar into about 4 oz. of softened cream cheese and cream it together like the butter and white sugar. Next you slowly add the lemon juice, making sure to keep the consistency like that of a frosting. It should not be runny, and you might not need all of your lemon juice.

Once the cake is done, place the pan on a cooling rack and let it sit for about 5 minutes before removing the cake. Place the cake on a dish and coat with frosting or pour your drizzle on top. Serve with vanilla ice cream.

Image 

And there you have it, Lemon Drizzle Cake.

Cheerio,

Dize
T’is the Season to Make Marshmallows!

Hey there again and welcome back! Dize gets to finally put his food blogger hat on for the first time in months, I won’t make any lofty promises about how many posts I’ll register in the next month or whether I’ll do anything innovative either. I will, however, take the time to make this post and tell you about how these delectable Peppermint Marshmallows turned out. Well, I can’t actually even do that, you see, because they need to settle for 3 hours to overnight before I can taste them. See how hard this is?

Anyway, I want this post to serve a few purposes – and forgive me if my writing has become a little more direct and thus more flippant, but hey that’s academia for you. First of all, I want to tell you why I made these marshmallows, giving both the short and the long answer. Then, I want to let the post devolve into praise, as a form of recognition of the people that have kept me going these past months. And finally, I want to make it clear the reasons why I cook and the benefits that cooking can offer each and every one of us. Here goes nothing!

You might ask, “Nathan, why in the world are you making marshmallows?” My short answer is, well, because they looked delicious and I needed to make something for a staff potluck. Both of these are valid reasons for making next to anything, and I would never stray away from making something you want to taste. That’s the beauty about cooking and baking; you get to eat what you’ve made when you’re done.

The long answer is much more complex and tightly wound in emotions, which ultimately come to bear somehow, and in some way. Mine, when I’m on top of my game, come out best through food. About a year ago I set out to make these marshmallows, but due to I’m not even sure what I never made them. I had all of the ingredients – let it be known that I only needed to go buy red food dye – and I was read to go. But, they never happened. In the last three months I’ve been trying to push myself out of my comfort zone, do things that I haven’t done, go places I haven’t gone, and generally be comfortable with the potential for failure. So these marshmallows represent more than pink blocks of sweetness, to me they mean that I’ve accomplished something I wanted to do for myself.

A lot of the difficulty I’ve been having in the last three months stems from starting graduate school. It’s a whole new life. At times it’s the most fun I’ve ever had, and others I just want to curl into a ball on the couch with a warm blanket and re-watch the first season of Weeds for the 10th time. Cooking has helped me through the fall semester, and as I look back on it these are some of the highlights surrounding food.

Before the semester began, I found myself behind the wheel of a Toyota Rav 4 headed west. I spent my mornings with a cup of coffee and the company of a new friend (with an old one sleeping in the backseat), talking about our favorite foods. For about 3 hours each morning we talked about bread, cheese, beer and wine. Old recipes, new recipes, and where we wanted food to take us. We even took our gourmand sensibilities fireside, as we mixed some of the best pasta I’ve ever had outside of my kitchen. Of course, it might’ve been better if the beers were cold, though.

Upon returning from my trip I started school. Although the food at orientation left a lot to be desired, people definitely had good food on their minds. When someone asked where the good coffee was to be found in our quant college town – note my dash of sarcasm – I knew I had found a new friend. We’re such good friends that we enable one another to drink at least 3-4 cups a day but only the primo stuff, folks.

With the new school year came a new roommate, another enabler I might add, who has been the perfect yin to my yang. And as a reward for balancing out our apartment chi I feed her on occasion. She was the impetus for one of my last posts and she is certainly one of the reasons why I’ve gone on this tangent. Keep it up girl, and maybe I won’t take all the food I make to school.

Friends and family are essential, and like food, they keep us going. Food has brought me together with people for runs, for post race cool-downs, to dinner parties with new friends. Whether it’s making breakfast for your inner circle after an epic night of reminiscing, sharing a cocktail with your family around the holidays, or if it’s simply the topic of conversation when you pick up the phone to talk with a dear friend. Family, friends, and food are essential elements in our daily lives.

As for the recipe I want to direct you to my dear friend Mama Ozzy’s food blog. He’s another person who is just as crazy about friends and family as he is about food. It’s always a joy to make something that Mama Ozzy has made because it takes me straight to his kitchen in North Carolina, a place where I’ve always felt at home.

Recipe

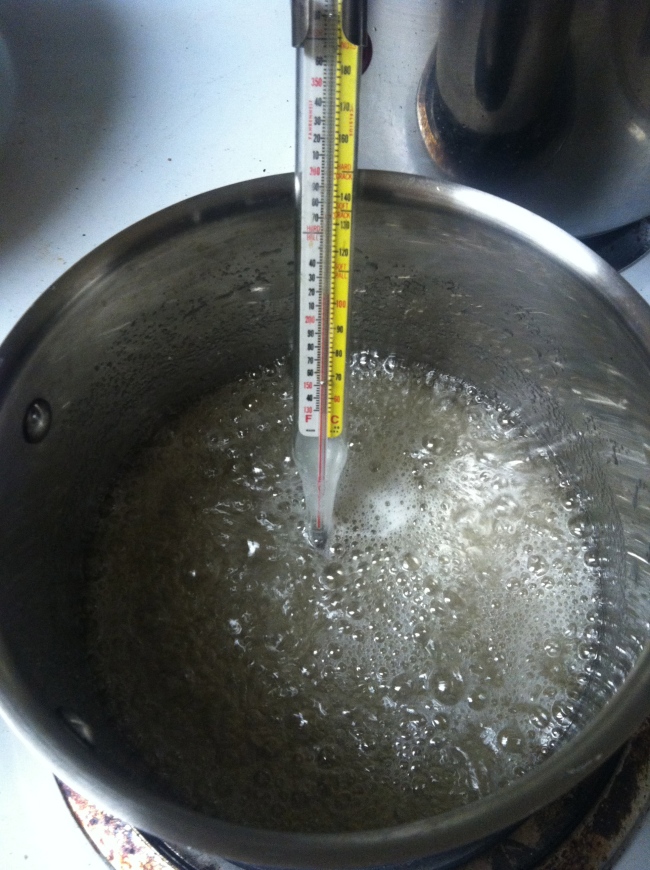
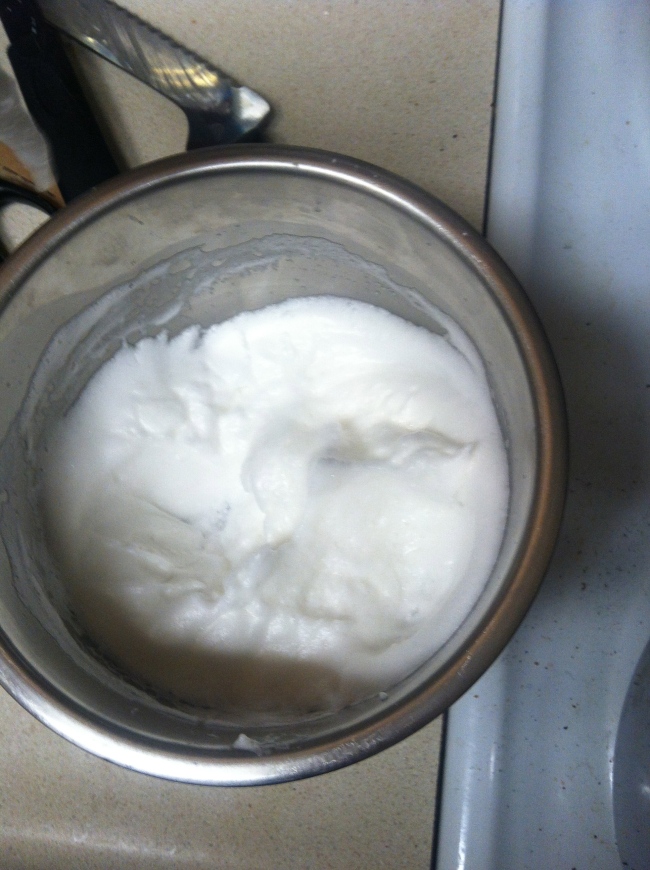
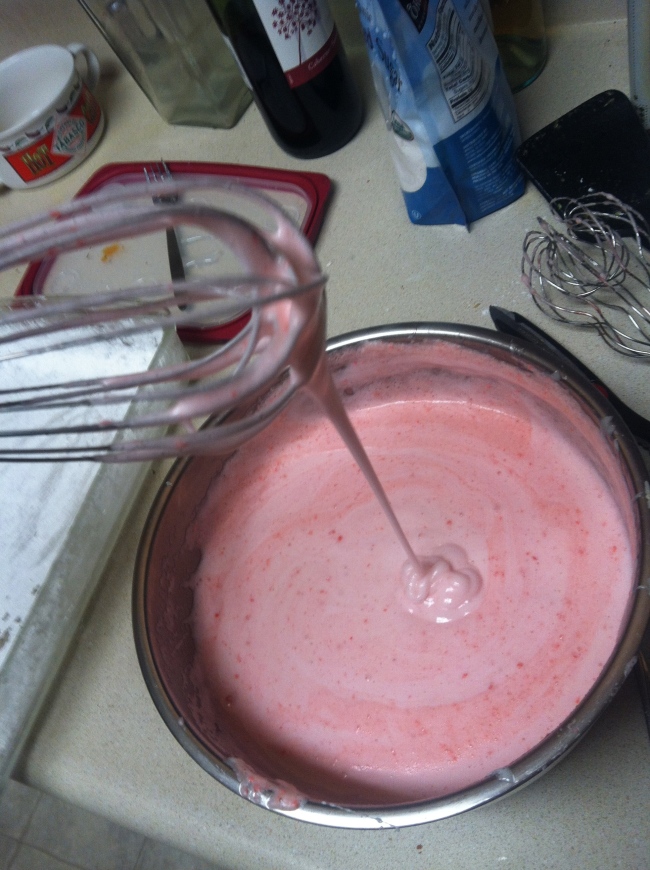
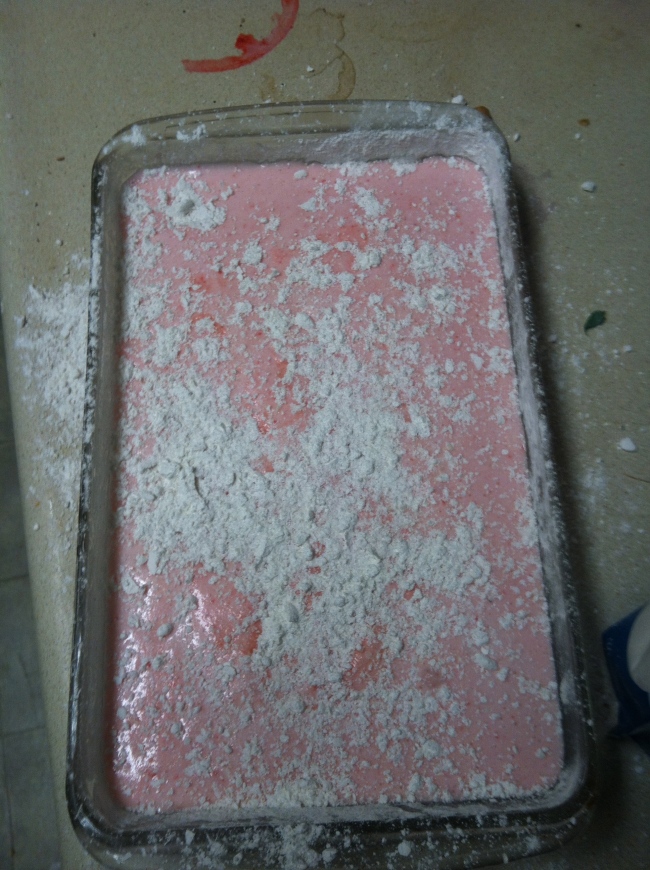
And to conclude this post – which was more of a stream of consciousness than a food post – I want to share some of the pictures of the marshmallows. Keep in mind that more will follow tomorrow when I cut them into cubes!

Image

Image


Image


Image

Until next time,

Dize

Aside

The Cow Jumped Over the Moooon

I shall now begin to review my favorite beers, wines, and spirits. I don’t wish for this to be a simple summary or classification of beverages at large, but rather to expand the space that led me to write this blog in the first place, and to relate these beverages to people and to share some of the memories they evoke.

For me, drinking has never been a solitary affair. In fact, one of the reasons why I decided to begin drinking craft beers, initially, was to relate to my father and to reestablish our relationship. I cannot remember which beer we started out with, probably either a Brooklyn Brewery or Heavy Seas offering, but I do remember by sharing a beer with him we entered into a whole new realm of communication. Sharing a beer, or any drink for that matter, allowed us to communicate on a different level. It gave us something to do, to think about, to talk about, and to this day beer often figures into our conversations. Sure, sometimes we get a little debauched, but most of the time the beer serves an hourglass. Yes, pun intended.

Anyways, here goes nothing. This first beer is a neat little offering called “Moo Thunder” by Butternuts Brewery from Garrattsville, NY.

Image

It is a fairly traditional stout, which distinguishes itself with its dark caramel color. Stouts are generally the most opaque beer out there, and they can often look like a cola. This stout is notably a “farmhouse” stout. According to my light research on the matter, I went slightly beyond Wikipedia, farmhouse ales are “low gravity beers” which are lightly carbonated and in the past these beers were produced in real farms in areas where the drinking water was of questionable origins. A place where beer is better than water? Sign me up! Issues of sanitation aside, this beer is a perfect middle of the road stout weighing in at 4.9 % abv. It makes for a perfect sipping beer with company, and because it’s a darker beer usually two will fill you up.

I remember the first time I bought Butternuts; I was at an organic supermarket and I told myself that since it was sitting between the Oskar Blues and the Heavy Seas on display that it couldn’t be that bad, right? Color me surprised. I loved all of four of their year-round beers: this stout, a hefeweisen, an IPA, and traditional American Pale Ale. As a plus, my friends thought I was super cool, at the time mind you, because the cans were so funky and creative! The jury is still out on whether or not I’m cool. You can be the judge.

Moo Thunder is truly something to enjoy, from its creative label right down to the last drop in the can. You can buy them in six-packs of cans or go for the Butternuts sampler 12-pack and try all of their farmhouse ales, which I highly recommend, especially if you are not a “stout person.” Although I will say, the most virtuous of us are.

Until next time,

Dize

Quiche is in the Air, Everywhere I Look Around

So, here goes another post. I’ve really been on top of it guys, I swear. This past Friday, was my turn to host the French Dept. graduate student potluck – even though it is not really a potluck because only one person does the cooking. The general idea is that whoever cooks, doesn’t have to furnish the bottle(s) of wine that it takes for all of us to wind down from a hectic week of teaching and learning. In true francophilic fashion, I chose to make quiches as the main course accompanied by cous cous and a key lime pie for dessert. The key lime pie was a special request by two of my delightful colleagues who had heard of the last time I made it and didn’t want to miss out on it this time around.

I would have been totally happy with the night had it just been me and my bookish colleagues, but we had a couple other wonderful people stop by as well – thanks to my socialite roommate, of course. We had a bountiful feast, shared in laughter and joy, all of which was capped off by a wonderful pie. Isn’t life just wonderful? The answer is yes, if there is pie.

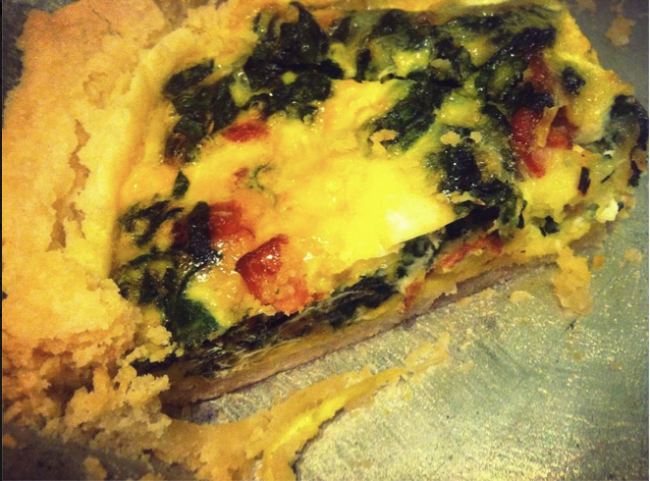
Now on to the recipes! First up is the Chard/Bacon/Swiss quiche. I know it sounds almost like a gimmicky fast food burger, but never doubt the power of bacon, butter, and a beautiful and slightly bitter green called chard.

Chard/Bacon/Swiss

Preheat oven to 375º

The crust:

1½ cups of flour

1 Tsp. salt

1/2 cup cold vegetable shortening (I’d like to emphasize the word ‘cold,’ which I will explain later)

4-5 Tbs. ice cold water
The filling:

½ cup freshly grated Swiss cheese

½ cup sautéed chard (only the leaves not the stalks)

6 strips of bacon

5 large eggs

¼ cup of whole milk

First comes the crust, and then the rest follows. No crust, no quiche. Capiche? Start off by combining your dry ingredients in a large stainless steel bowl. Then, prepare a cup of ice water and set to the side. Finally, take your vegetable shortening out of the refrigerator, measure out a cup, and place it in your bowl of ingredients. BEWARE: If your shortening is not cold to begin with, you will be faced with the Sisyphean task of working with warm dough, and it will stick to everything you can imagine while trying to roll it out later. With a pastry blender, you’ll want to work the cold shortening into the flour until the moment it forms little pea sized balls at which point you can start adding a tablespoon of water at a time to your dough. It should only take about 4-5 tablespoons to form one large ball of dough, once you have formed your ball of dough wrap it in plastic and immediately place it in the fridge.

Now that your dough out of the heat, you can start to fry the bacon. Some people like really crispy bacon, and I do too from time to time, but in this case I want the bacon to be like a fattier version of ham. Make sure to reserve the grease because this will make your chard even more delectable. Next, take out your chard and separate the leaves from the stalks. Give them a nice coarse chop and throw them in the bacon grease. Sauté for about 3 minutes, making sure not to overcook the chard – it will be cooking in the oven too so it’s fine if it comes out a bit crunchy. Now you can take out the Swiss cheese and grate about ½ cup. Set all of your ingredients to the side and get ready for crust rolling mayhem, it’s not that big of a deal if you have a) cold dough and b) a decent rolling pin (which I do not).

Begin by dusting your rolling surface with flour; this dough will stick to anything so no need to be conservative with the flour. Place the dough on your floured surface and push the ball down with your hand to create a circle. Next, begin rolling the dough out until it is about ¼ inch thick. Then using the rolling pin, roll the dough up onto the rolling pin, and unroll it into a buttered pie dish. Side note: I promise never to use roll that many times in a sentence ever again. Form the dough to into the dish and cut the excess dough off the sides. Save the excess dough because it may come in handy later for patchwork in the next quiche.

Now, add all of your fixings to the pie dish. Whisk 4-5 eggs together with ¼ cup of milk and pour over your ingredients. Place the quiche in the oven for 45 minutes.

Sweet Onion/Chèvre

Preheat the oven to 375º

The crust:

1½ cups of flour

1 Tsp. salt

1 cup cold vegetable shortening

4-5 Tbs. ice cold water

The filling:

1 Sweet onion

¼ cup chèvre (I used plain goat cheese, but I’m sure you could add nice flavor with an herbed chèvre)

4-5 large eggs

¼ cup of whole milk

This one seems simpler than the previous quiche, but note that to get the perfect results you’ll need patience. Start out chopping your onions using a very coarse chop and then add them into a skillet with about 2 tablespoons of melted butter. You should keep your onions on low heat at all times, they will slowly caramelize over the next 15 minutes.

While your onions are caramelizing, you should make your crust (see above).

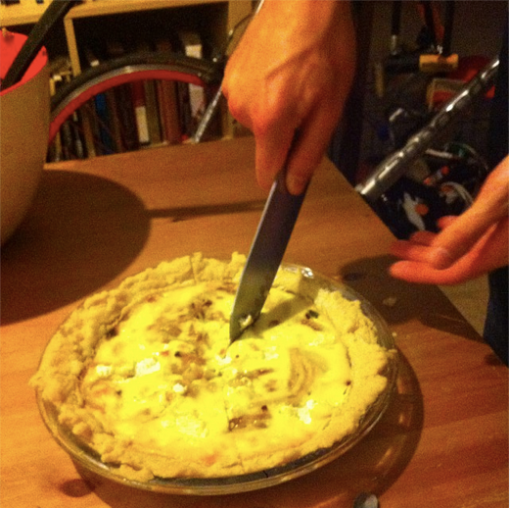
Now that you have the crust made and molded to your pie dish, add your onions and the goat cheese (in chunks about the size of a quarter) so that you nearly cover the layer of onions at the bottom. Next, add your egg and milk mixture to the pie. Be sure to mix the contents around so that the egg mixture works into any onion filled spaces.

Place in the oven for 45 minutes.

Key Lime Pie

By the time you’ve made all these quiche, you’ll be dying for some pie. I actually made this first because I wanted it to set while I cooked the quiche and while we ate.

Preheat the oven to 350º

Ingredients:

8-10 Honey Graham Crackers

6 Tbs. of salted butter

1 can of condensed milk

4 egg yolks

½ cup key lime juice (Sometimes I lie ad say that its key lime pie when I can’t find key limes, this time was not one of those times)

Whipped cream:

½ cup of heavy whipping cream

First, melt your butter in the microwave or on the stove. Next, crush your graham crackers in a Ziploc bag with a blunt object – i.e. rolling pin, handle of a chef’s knife, etc. Pour the crumbs into the butter and stir. Now take another pie dish –if you still have any left­ – and mold the graham cracker crumbs into the pie pan so that it creates a uniform thickness along the sides and the bottom. Place the crust into the oven for 8-10 minutes.

Now take your 4 egg yolks and whisk them together with your can of condensed milk. Afterwards, start to slowly incorporate your lime juice into the egg/milk mixture, about 1/8 cup at a time. Once you’ve mixed all of the juice together with the eggs and milk, pour the contents into your piecrust. Place in the fridge for a couple hours.

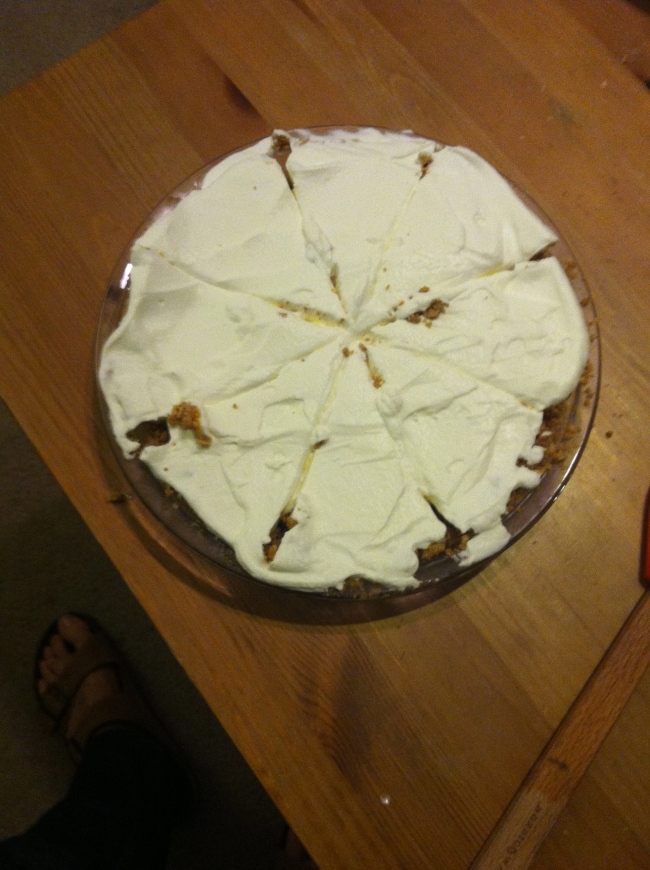
Right before you serve your pie, take out your heavy whipping cream and whisk the cream until it forms soft peaks. For more insight on whether I think you should hand whisk or use a mixer, please see my previous post about meringues. Add about 2 tablespoons of granulated sugar to the whipped cream and stir – note that if you add the sugar prior to whipping you will be doing yourself a great disservice and you will be whipping the cream for 3x as long. Spread your whipped cream on top of your pie so that you cover the entire surface of the pie, changing its appearance from green to white.

Image

ImageImageImage

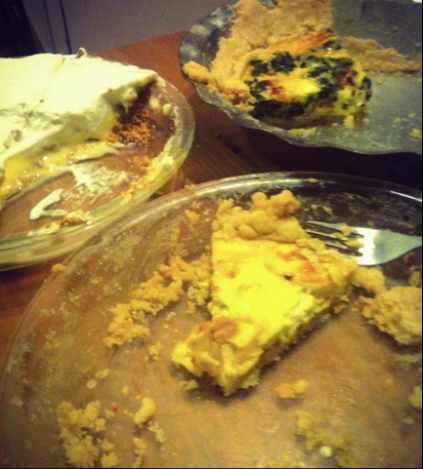
And there you have it folks, a pie-centric meal brought to you by yours truly. Also note that I forgot to take play-by-play pictures, for which I am sorry, but I was in dire need of multiple sous-chefs for this production and I only had one. Thanks Erin McCormick for all of your help!

Photo credits: Sara Hill Isacson, Philippa Hughes

Unpearably Delicious Pizza

Pear Prosciutto and Chêvre Pizza

Recently, I’ve been really bogged down with life and the other things that tend to take people and divert them from their passions. Don’t worry! I’m here to stay. That is, until the next round of seemingly impossible tasks that I’ll inevitably face as I try to navigate being a graduate student, a foreign language teacher, and a sane 20-something in a city full of distractions. My brief hiatus, which was about two weeks long, was mostly from the blogging aspect of my cooking/baking hobby. There will be more posts forthcoming, but I just need to figure out how to budget my time effectively in the early goings.

One thing in particular that I am very thankful for is my new roommate, because once again I have someone to cook for and someone to show off to. You may say, nobody likes a show-off, but you can’t say that if your eating my delicious pizza. Or, can you? In order to fully welcome my new roomie to DC, I decided that we needed a proper meal. However, I did not anticipate how hungry both of us were at the time and that led to both of us huddled in the piping hot kitchen, watching the cheese melt and the prosciutto crisp.

As I have been known to do in the past, I have borrowed a pizza crust recipe from a fellow food blogger, (http://kristininherkitchen.blogspot.com/2011/09/no-yeast-pizza-dough-with-whole-wheat.html) which I have found to be both really quick and simple to whip up. As I have I have quickly learned with teaching, the idea isn’t to reinvent the wheel, but rather to learn to do what others do well before you go rogue and create your own concoctions. And now, the ingredients maestro!

Crust:

Pre-heat your oven to 400º F

1 ½ cups whole-wheat flour

½ cup white flour

1 Tbsp. garlic powder (I deviate from the aforementioned food blogger’s recipe because I love garlic)

2 tsp. baking powder

¾ cup of water

¼ cup of extra virgin olive oil

Toppings:

1 Bartlett Pear

3 oz chêvre (Goat cheese)

3-4 large sheets of prosciutto (depending on the cut of prosciutto this can change)

Balsamic vinegar to drizzle afterwards

This is very simple to make because you can just throw everything into a bowl and work it into a ball of dough. Knead the dough lightly for about 2 minutes. Next, place onto a flat surface and roll your dough into a circular pizza pie – you’ll see how the perfect circle is hard to come by looking at the “circle” I came up with. I baked my crust for about 8 minutes, but if you prefer a really crispy end product you can leave it in for a total of 10 minutes. 

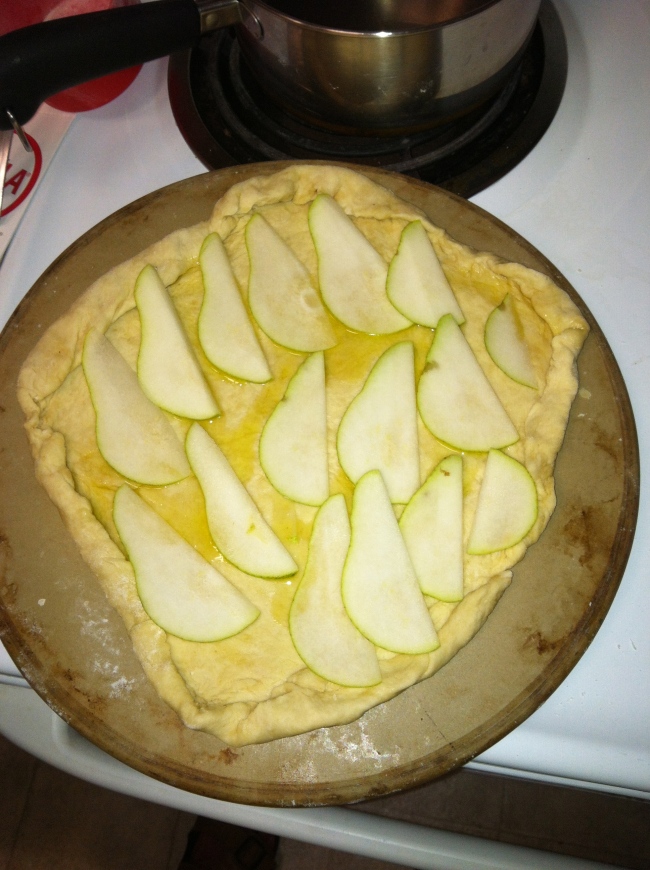
While your crust is in the oven, take the time to thinly slice your pear so that you can cover the entire base of the pizza. Thinner slices cook faster, which for me means eating faster – also known as the end goal to all cooking. You can also prep your prosciutto by taking it out of its packaging.

Image 

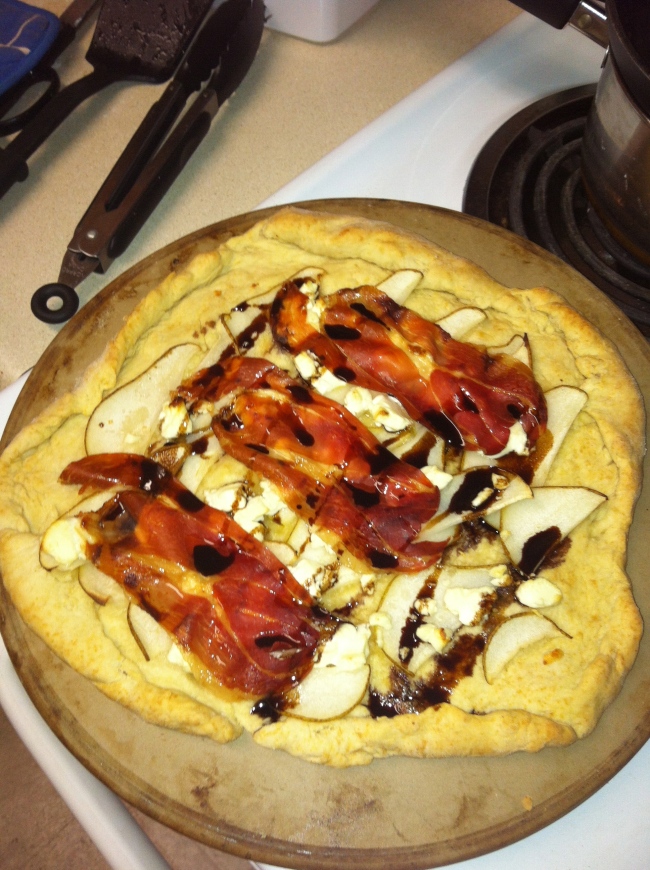
Now that your crust is out of the oven, place your pear slices strategically so that you cover the entire pizza. Then, crumble your goat cheese overtop the pear slices. Be careful that you are not leaving any areas without delicious goat cheese, because it’s no fun having a slice without cheese. Finally, top with your prosciutto and place into the oven on 400ºF for another 15-20 minutes, or until the bottom is completely browned.

After you take your pizza out of the oven, and drizzle some balsamic vinegar on the pizza to give it some contrast in color.

Image

Now, it’s time to eat! Zann and I were so happy with this pizza, not only because it was delicious, but because it signaled the start of a new school year, a new job, and life after our undergraduate careers. And if there be pain and suffering ahead, may we suffer with an ample feast at our fingertips.

Until next time,

Dize  

The Tale of Two Cocktails

I understand that this is my second post about cocktails, and so I thought clumping two together I may dispel some myths about how much drinking occurs during the summer. Convinced? I didn’t think so, but anyways here are two cocktails – a classic with a twist and an original offering.

“La vie en rosemary” ­­– France 75 with rosemary simple syrup

Until this spring, I had never tried a France 75. When I heard that it included gin and lemon juice, I decided that this would probably be one of my all time favorites given my year-round love for gin and tonics. Although not the refreshing drink the gin and tonic is, the France 75 is one of those cocktails that you’ll need to save for a dinner party or an evening of familial debauchery.

It is a fairly easy cocktail to recreate; its history is slightly more enigmatic. Why the name France 75? It was created in France during the 1920s, and given what some of you may know about Paris in the 20s life was pretty loose, trending towards a never-ending soirée. Given the fact that it was created in post-war France, its creator dubbed it the France 75 after a piece of French artillery that fired 75mm shells. Hence, he arrived at the moniker for the France 75.

While not as deadly as a 75mm artillery shell, I would urge caution while consuming France 75s, because you may soon find that you’ve had one too many. But, enough with the warnings, here’s the recipe for the rosemary syrup and the cocktail itself.

Rosemary simple syrup is a really easy thing to come up with, you just need sugar, water, water, and rosemary sprigs.

30 leaves of fresh rosemary

1 cup of water

1 cup of white sugar

Take about 30 leaves of rosemary, place them in a mortar and pestle, and add a pinch of sugar. Start by bruising the rosemary in order to unlock those flavors a bit, and then place in a medium saucepan. Now add 1 cup of water and 1 cup of sugar to the saucepan and place over low heat. Your syrup should never boil, but it should simmer for about 10-15 minutes on low. Once your syrup has simmered for the 10-15 minutes, take it off the heat and allow it to cool. Once it has reached room temperature, strain the rosemary, and place the liquid in the refrigerator to cool.

The juice of 3 lemons (about ½ cup)

¼ cup of rosemary simple syrup

4 shots of gin (I used a French gin because I prefer a more floral gin, but you can stick with the driest of London gins if you like)

Shake well with ice in a cocktail shaker.

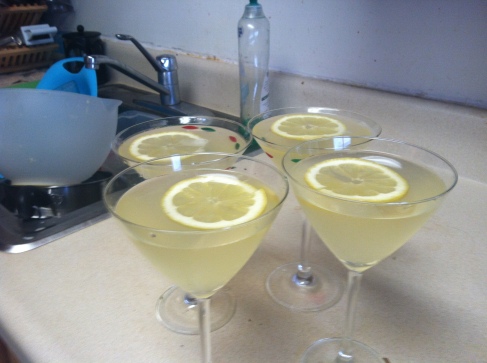
Pour the contents equally into highball glasses and top off with Champagne and a slice of lemon. 

Makes about 6 drinks

Image

 “Honey don’t” – Honeydew slushy

I know everyone’s really mad with me about the horrendous name I gave this cocktail. For those who will forgive me, I’ll make you one! This is the follow-up to my cantaloupe cocktail in a series of melon inspired drinks. I decided that I wanted to make a whiskey cocktail that was deserving of the bottle of Whipper Snapper (http://americanhooch.com/2011/01/03/whippersnapper/) that I finally purchased after eying it for months – I repeat, I do not have a problem.

This cocktail is very simple and will yield about two drinks. First, you need to freeze a couple slices of honeydew. I would say that two-2×1 inch chunks should suffice. The frozen honeydew will also, in the case of this drink, serve as your ice and create a slushy texture. No need for watering this cocktail down with ice, because that would ruin everything. Once you have the honeydew, you’re ready to begin. The ingredients are a follows:

Combine in a cocktail shaker,

2-3 chunks of honeydew

3 shots of whiskey (Like I mentioned before, I used a blended whiskey that was close to 80% corn rather than a bourbon whiskey. I feel as though bourbon would be too vanilla-y for this cocktail, but to each their own.)

1 Tbs of honey

First, combine the honeydew and the whiskey in the cocktail shaker. Shake the contents until the whiskey is cold. Next, take an immersion blender and blend the contents – for you fancy blender-owning people, you can just pop it in the blender. Pulse the melon and whisky so that you end up with a pourable mixture, while trying to keep the melon slightly intact so that your drink will be left with a nice melon cube. Now add your tablespoon of honey, and pulse.

Serve your drinks in wine glasses and enjoy your warm summer evening with an ice-cold drink!

Image

Cheers,

Dize 

High Time for Pie Time

Banana Cream Pie with Bourbon Saltine Crust

This is the first time I’ve ever made a cream pie. However, I have made pies that need to set up in the fridge so I wasn’t too intimidated by this project. Not only was this my first cream pie, but my first pie I’ve made with a saltine cracker crust AND a meringue. There’s a first time for everything, so here’s pie in your eye!

I will admit, that I consulted two sources for these recipes Allrecipes.com and whatscookingamerica.net. Although I used their recipes for the quantities and staging, I felt that their directions were a little haphazard, and, at times very difficult to decipher. So I’ll be re-rendering a fuzzy picture, please bear with me.

The only “original” thing I did here was make a saltine cracker crust, and I think I should start with that because without it you’ll have a filling but no pie. This should make you a 9” piecrust. To start you will need:

To preheat your oven to 375º

25-30 saltine crackers (Approx. you want to cover the entire pie pan with a ¼ inch thick layer of crumbs)

4 Tbs of unsalted butter, melted (please, you have enough in the crackers)

1 Tbs of bourbon (You could use a lower quality here, but I had a corner of Knob Creek that I finished off instead)

1 large egg (I didn’t use this initially, but I’ll explain why I’ve added it later)

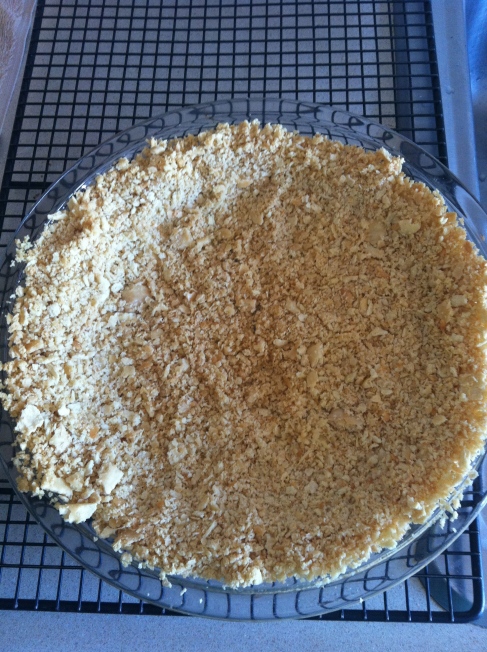
First, place about half of your crackers into a plastic bag and pulverize your crackers until they become crumbs – a little bigger than the store bought breadcrumbs you may have seen. Place them into a mixing bowl and repeat with the rest of your crackers. Add your melted butter, bourbon, and the large egg to the breadcrumbs and hand mix. If the mixture does not clump up slightly and stay together then you will need another egg. Take your mixture and place into a buttered pie pan and work it around so that the crust covers the entire surface of the pan, sides included. Hopefully, you’ll end up with something that looks like mine. (See below) Next, place in the oven for about 10 minutes on 375º or until golden brown.

Image

And now for the filling! After having made the filling, I realize that it’s pretty much just pudding so don’t fret if there’s extra because that means you’ve got another dessert or a snack for another day. My kind of recipe, am I right?

The ingredients are as follows:

Change the oven temperature to 350º

¾ Cup granulated sugar

1/3 Cup all-purpose flour

¼ Tsp. of salt

2 Cups of whole milk (I prefer whole, but you could slim it up a bit with 2% or 1% milk fat)

3 egg yolks (be sure to reserve your egg whites for the impending meringue to follow)

2 Tbs of unsalted butter

2 Tsp. of vanilla extract

2 large bananas (if you have small bananas you might need as many as 4 to cover the bottom of your pie)

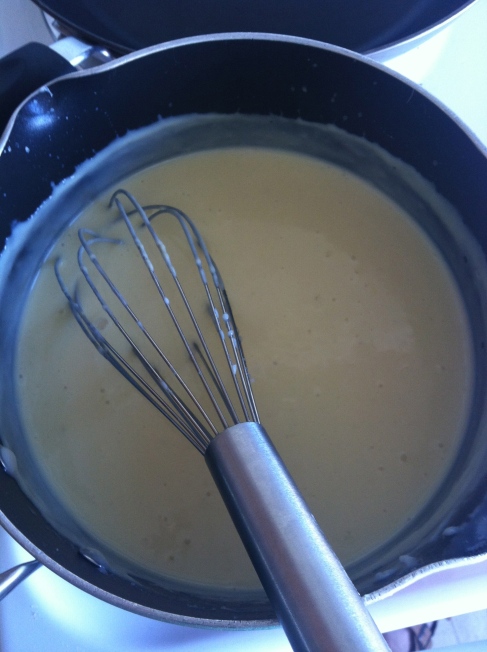
To begin, add two cups of milk to a medium saucepan over low heat and then incorporate the flour, sugar, and salt. This may feel like you’re making a roux, and you are – sort of. The idea is that the flour and sugar should thicken the milk, but that comes later so be patient. Stir the mixture until it begins to bubble. Continue stirring for about two minutes longer and remove from heat.

In a mixing bowl on the side, take your egg yolks and whisk them together lightly. You don’t need to emulsify them, just whisk them together. Next, take about a 1/3 of a cup of your milk mixture and add it to the yolks and whisk together. Place your milk mixture back on the stove on low heat – the idea is to bring the mixture to a simmer. Now, pour the egg yolks and milk mixture into the saucepan and stir. Continue stirring for two minutes until it begins to feel thicker. Remove from heat and add the butter and vanilla. Stir well.

Image

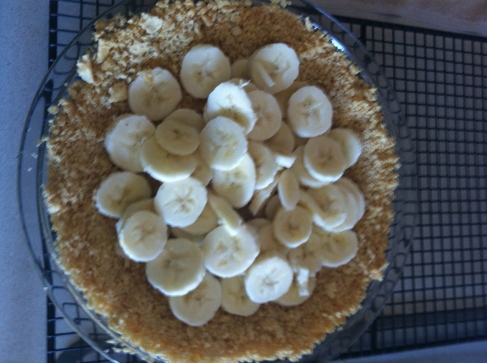
Since you were busy stirring your filling, or should have been busy doing so, you didn’t have any time to slice your bananas. Don’t worry; they didn’t ripen much since you set them aside for the recipe. Now slice your bananas into quarter inch thick slices and place them around the bottom and the sides of your piecrust completely covering every visible portion of crust.

Image

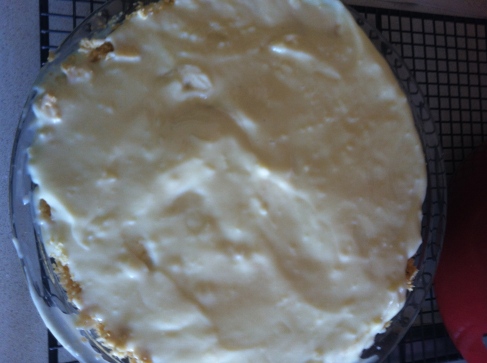
Now pour your pie filling into the crust, covering the bananas completely.

Image

Set the pie to the side, and immediately start working on your meringue. You will need:

6 Tbs of sugar

3 eggs (whites only, which should have been reserved while making the pie filling)

The website I used recommended no less than 2 Tb of sugar per egg  for a proper meringue. I used slightly less and still came up with a sufficient meringue. I would heed the advice if you’re pleasing a crowd of people with this pie, but for the health conscious and didactic cooks out there I would experiment with less.

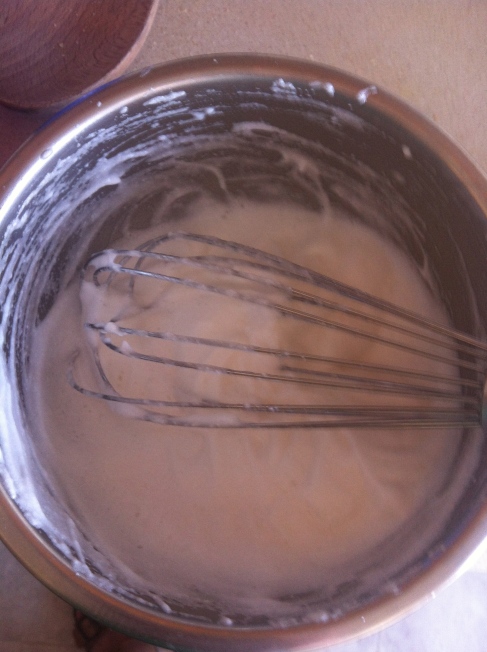
Before you think about adding sugar, start whisking or mixing your egg whites until they reach soft peaks.

Allow me to take some time to digress a bit and give a shout-out to my friend Emma, I did this without your stupid mixer. With that said, to each their own, you can use a mixer if you like but I don’t currently use one. There are advantages and disadvantages that have been brought to my attention by a very wise cook. Hand whisking, for one, will discourage you from breaking the meringue due to over-mixing. However, you may experience extreme fatigue in your arm, elbow, and shoulder after whisking for about 8 minutes. I think if you want to experiment with hand whisking that’s fine, but most people would save themselves the trouble by conscientiously using a hand-held mixer or a stand mixer for these projects. Whichever method you choose, be sure to be open to the other ways of achieving the same desired effect. Ahem, Emma.

Now that you’ve gotten your peaks, go ahead and whisk that sugar into your egg whites. You should not lose any thickness in your meringue after adding the sugar, if you did, then you may have either not had the right consistency to begin with or you over whisked the whites.

Image

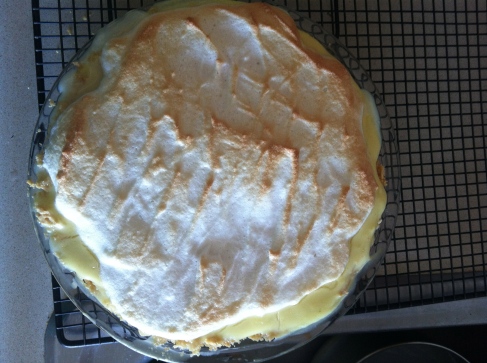
Now apply the meringue to the top of your pie and place in the oven for about 20-25 minutes carefully monitoring your meringue. My advice here is that your filling is already cooked, you’re just trying to reduce the volume a bit and cook the meringue. So as the meringue goes, your pie is done. Aim for a nice, light brown color on your meringue and you’ll have the desired results.

Image

I know this was a long post, essentially 3-in-1, so thanks for reading.

An interesting post-scriptum: Remember seeing clowns pie people in the face with banana cream pies? Why would you do that if you’ve worked this hard to make it, or write a blog post about it? I’m at a loss for words.

Take care,

Dize

A Scone, Old Chap?

Cranberry-Almond Scones

Okay, so I’m not going to make any outlandish claims by saying scones are my Madeleine of sorts, but I do remember quite fondly the way these tasted fresh out of the oven on the various occasions my stepmother Helen has made them. If I tried to come up with an exact day that she made them or what was in them you could brand me a liar for life. I liked them fresh and warm served with butter, that’s all you need to know! Glad we sorted that out, and that I worked in my requisite French allusion.

Additionally, I’m not sure if my stepmom has a specific recipe she follows or whatever, which is why we have the Internet these days. I simply adapted a recipe I liked from Allrecipes.com to fit the flavors I wished to evoke. 

I wanted to make cranberry-orange scones, but when I couldn’t purchase a single orange at the Whole Foods my recipe quickly changed to cranberry-almond scones. Maybe someday I’ll revisit scones (perhaps to win over my future colleagues) and make cranberry-orange ones. 

Start by pre-heating your oven to 400º F.

As for the recipe, the ingredients are as follows:

2 cups white flour

1/3 cup sugar

1 teaspoon baking powder

¼ teaspoon baking soda

½ teaspoon salt

1 stick (8 tablespoons) of butter, frozen

¾ cup cranberries

½ cup almonds, sliced

½ cup sour cream

2 teaspoons almond flavor or extract

1 egg

At first, I was a little skeptical about using frozen butter in anything because I couldn’t see how you could incorporate it with ease. However, if you use a cheese grater (the larger holes) to grate the butter over the dry ingredients you’ll find the results are much more manageable than using room temperature butter.

Begin by combining and mixing all of your dry ingredients in a large bowl. Once they are all mixed together, carefully grate your butter over the dry ingredients. Start to work the butter into the dry mixture by hand, but do not over-mix and melt your butter. The butter should be treated as a hostile witness who just wants to melt and ruin your day. So, be nice to it and treat it as though it is pie dough and it’ll cooperate with you. Once you see the butter and flour mixture reach the size of large granules, toss in your cranberries and almonds and lightly incorporate them. 

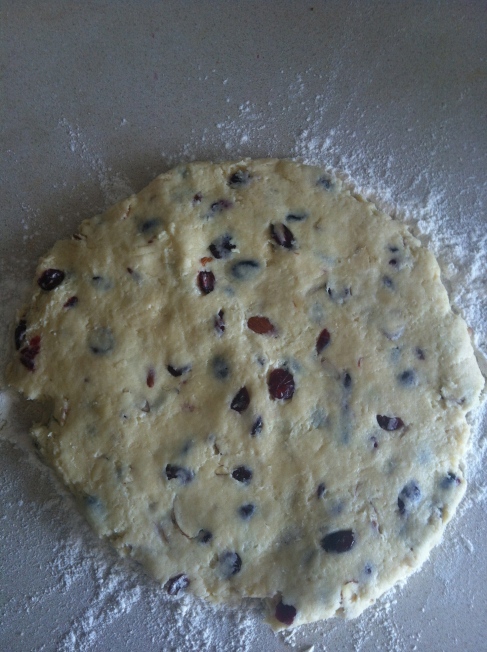
Now it is time to mix your wet ingredients. In a separate bowl, combine one egg, ½ cup of sour cream, and your almond extract. Whisk them together and pour into the dry ingredients. Begin to work the dough into a large ball. The dough will be moist, don’t add any more flour, bare with it and allow it to be slightly wet. Now, lightly dust flour on a flat surface. Place your dough ball in the middle of the flour and flatten it into a 7-8 inch circle, about ¾ inches thick. I had never done this before, but I was really impressed by how easy it was and it allows me to say “screw you” to my rolling pin for the time being.

 Image

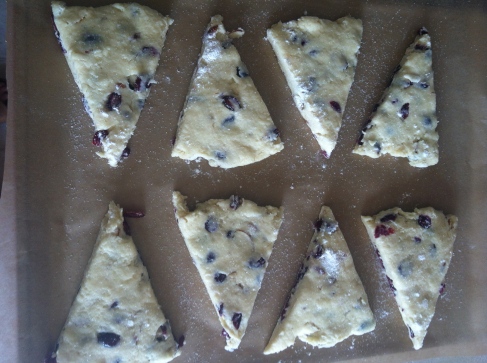
Once you’ve got your circle, cut the dough like you would with any pie into 8 triangular slices and sprinkle with a little sugar. I have to say I wish I would’ve had a more ornate sugar to add something to the aesthetic dimension of my scones, but then again I suck at aesthetics as the people I’m usually feeding never cease to remind me of.


Next, place the triangles on a baking sheet lined with parchment paper and place into your oven pre-heated to 400º oven.

 Image

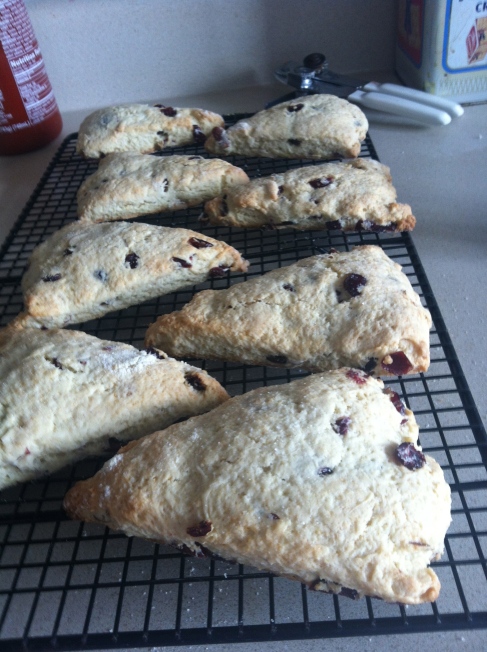
Mine took about 17 minutes, but 15-17 minutes should get you to that done to golden brown range. Remove from the pan immediately and place on your cooling rack (if you don’t have one, get one because your life will improve drastically). Serve after about 5 minutes with butter and tea or coffee.

 Image

Cheers!

Dize

If you ever need an excuse to make fruit better…

Make a…

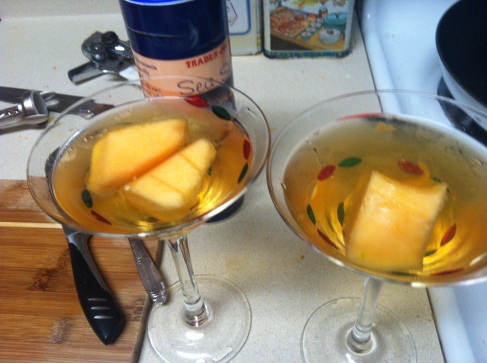
Salted Cantaloupe Cocktail!

Okay, so I never meant to give off the impression that this would be a dry food blog and nor will I admit to being too creative behind the bar. With those two things in mind, I felt inspired by the delicious cantaloupe that I bought at the U-Street farmers market and decided to have a go at something new and fun. The taste of the evening is a salted cantaloupe concoction I will call a “Salty Melon.” What, were you looking for something punny? Sorry, I’m off my game today. So here goes nothing.

2 slices of cantaloupe (about 2 inches long and 1 inch thick)*

1 shot of brandy

1 shot of bourbon

1 Tb of honey

4 oz tonic water (to top off both drinks once mixed)

*I could walk you through slicing your whole cantaloupe, but I think that’s a little much so I’ll start at the “Now that you have your 2×1 slices of cantaloupe…” 

Now that you have your 2×1 slices of cantaloupe, go ahead and sprinkle a little salt over them to unleash the flavor in the melon. Place to the side so the flavor can develop.

Next you should add your brandy, bourbon, and your honey into a cocktail shaker loaded with ice. Shake until the contents are cold. Place your cantaloupe into two highball glasses and top evenly with the contents of the cocktail shaker. Once, you’ve done that add equal parts tonic water to the top of the drink and lightly stir.

 Image

Now that you’ve got your drink in hand, I say cheers and thanks for reading.

Dize

Beat the heat without the meat

Quinoa Burgers

I feel like two posts in a week is kind of crazy, but here goes nothing. On Sunday, I decided that I wanted to give Quinoa burgers a shot. I thought long and hard about the flavor that I wanted, the colors that I wanted my burgers to have, and above all else, the consistency. I wanted the consistency to be like that of – real shocker – an actual burger. It needed to be moist but firm, juicy and succulent, and with a little crisp on the outside. Clearly, I have high standards for my Quinoa concoctions because I refuse to eat anything too doughy and dry or something that falls apart into a mush like cream of wheat. No, these burgers would be everything I dreamed of and more.

My first batch went well, so I decided to try my hand at a new flavor combination. So I set out to make goat cheese and rosemary quinoa burgers. First, the list of ingredients:

1 cup of quinoa, cooked and refrigerated

3 oz goat cheese

2 Tb of fresh rosemary

1 Tb of garlic powder

1 Tb sea salt

3 Tb of maize/corn flour

1 large egg

2 cloves fresh garlic

½ a yellow onion

I recently read Cooked by Michael Pollan and in his chapter on “Water” he elaborates the importance of aromatics in cooking. He was counseled by one of his former students to allow for aromatics to cook slowly, allowing them to properly caramelize rather than singeing the vegetables. No need to rush, just patiently take in the aromas as you work on the rest of the recipe.

Image

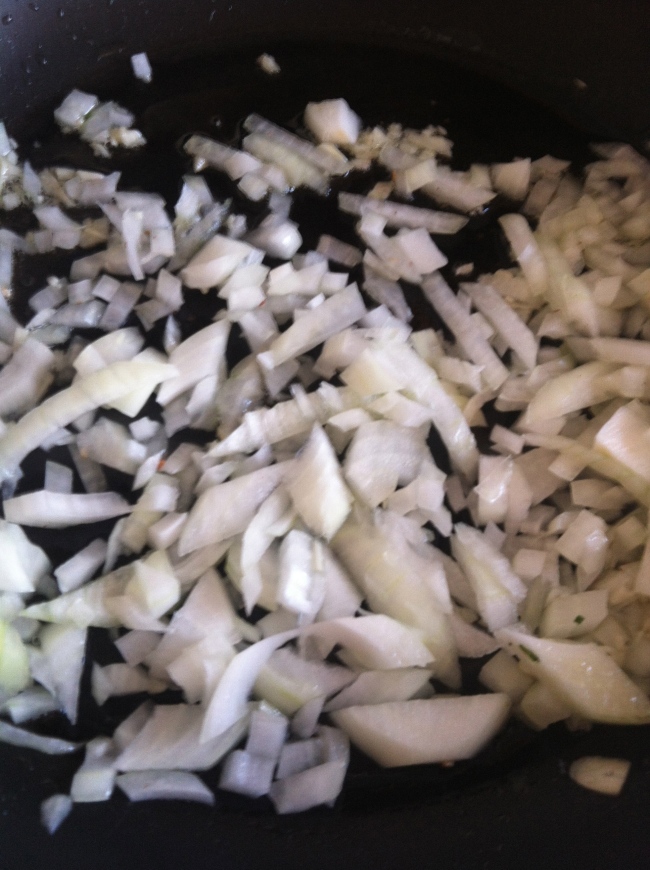
Heeding Pollan’s advice, I finely diced my garlic and onions and set them in a hot pan of oil on low. Then, letting the flavors mellow, I began to mix together the rest of the ingredients for the burgers in a mixing bowl.

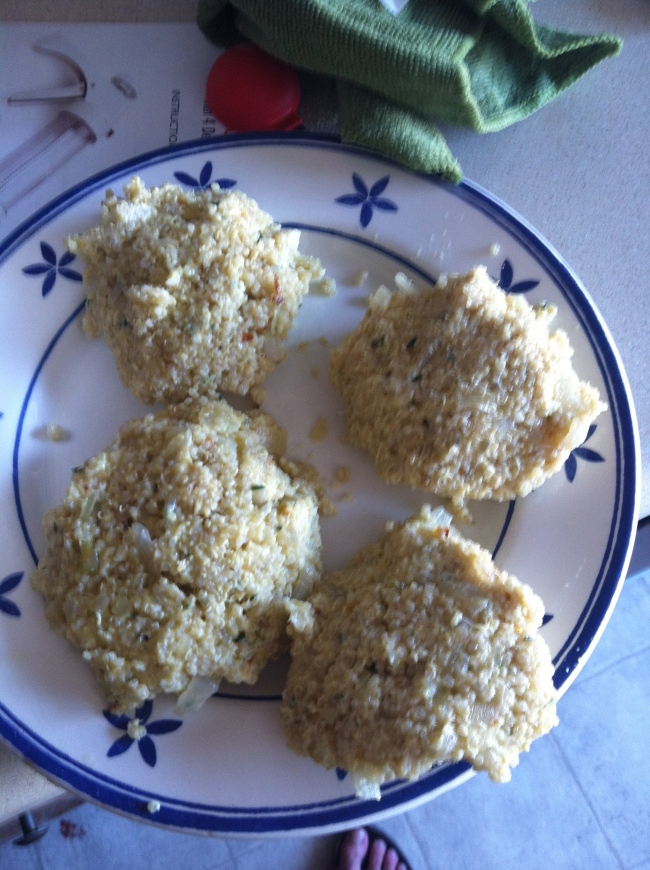
First I added my quinoa to the bowl and took note of how moist it was. It is important to have a moist mixture, but too moist would run and too dry would break apart before it reaches the bun. Be sure to keep this in mind while adding each ingredient to the quinoa. I finely diced my rosemary and added it, along with the garlic powder and salt to the quinoa. After mixing it together by hand, I added the goat cheese and took note of how moist my mixture was. The goal is a slightly dry mixture so that when you add the egg you come out with a sticky product that resembles the consistency of any ground meat.

Image

This is the hard part; you need to add each tablespoon of corn flour one at a time until you reach the proper consistency. The mixture should not be dusty, but it should also not be gooey and sticking to your hands. Once the proper consistency has been reached, add your egg to the quinoa “batter.” Mix by hand.

At this point your aromatics should have caramelized. Remove from heat and toss into the quinoa mixture.

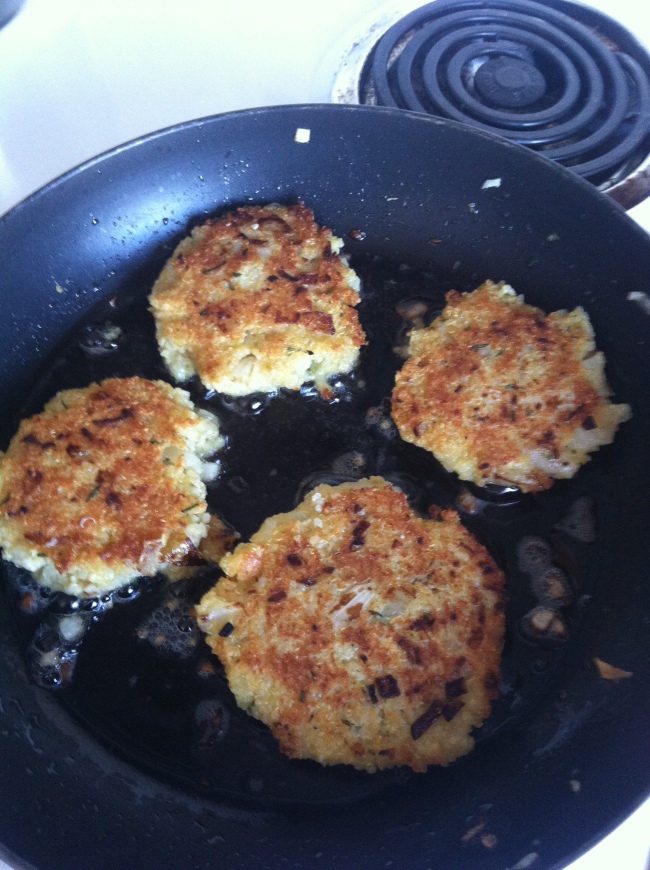
Now you are ready to form patties of quinoa burgers! I like larger burgers, but you could also make cute little sliders if you chose to do so. One by one, place them into a pan of oil and crisp on each side for about 4 minutes each over medium heat until they have a nice crunch to them. Be sure not to overcrowd your pan! I used a 10” skillet and had 4 patty-sized burgers going at once. Make sure that there is sufficient space to flip the burgers and you should be fine.

Image

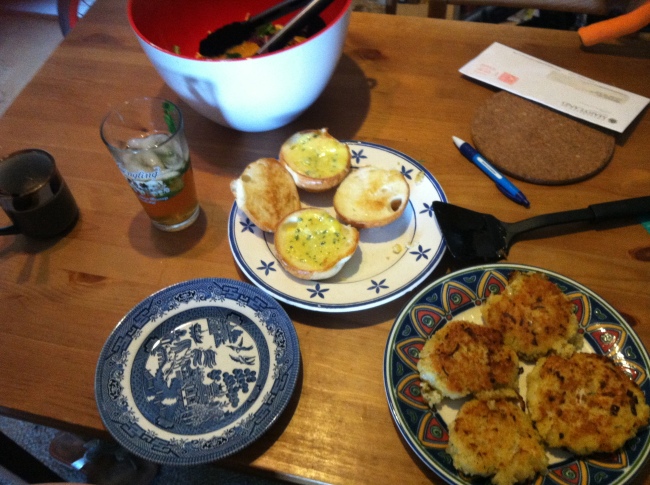
Now, you’re ready to enjoy your burgers! I served them on sourdough buns that I crisped in a pan of butter along with some of that basil aioli I made the other day and some ketchup. Serve with a simple salad.

At this point you’ll probably realize that you’ve made something that is so delicious, and vegetarian (almost vegan) that won’t take years off your life! Enjoy!

Image

Until next time,

Dize